Workspace #
Workspace setting #
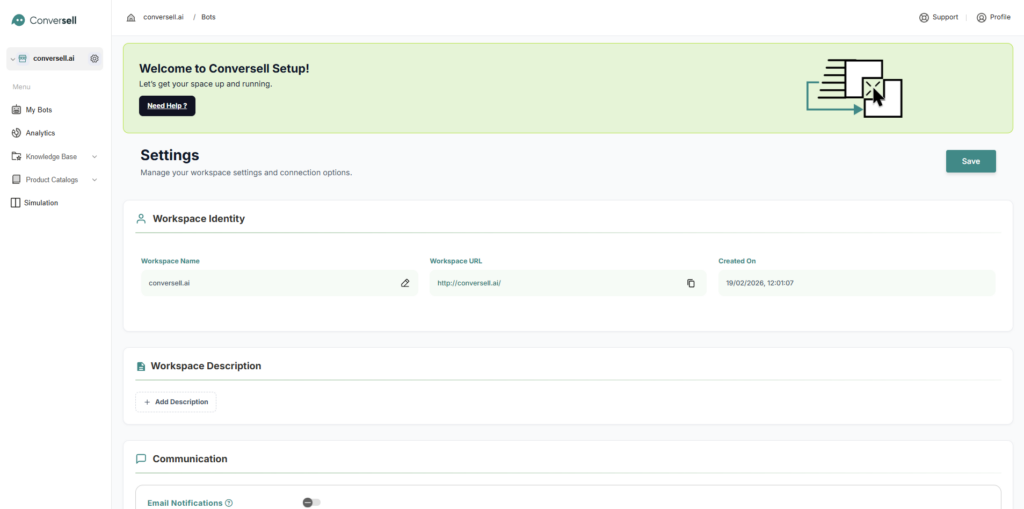
This section establishes the basic identifiers for your workspace:
- Workspace Name: Customize the name of your organization or project (e.g., « conversell.ai »).
- Workspace URL: View the unique web address assigned to your workspace.
- Creation Timestamp: A read-only record showing exactly when your workspace was generated.
Workspace Description #
- Contextual Overview: Use the + Add Description button to provide a brief summary of the workspace’s purpose. This helps team members understand the scope of the assistant being built.
Communication #
Manage how the system interacts with you behind the scenes. By turning on the toggle of email notifications, you will receive email notifications once a user requests a handover to a support agent.
Integration Steps #
Once your identity is set, you can transform your workspace into a high-performing support hub through these integrated steps:
- Add AI Knowledge: Click + Add Knowledge Base to upload FAQs, business documents and scrape your website in seconds. This allows your bot to provide accurate data-driven answers.
- Create Your First Bot: Click + Create Your Bot to design the conversational flows and automate your customer interactions.
Subscription Plan #
Keep track of your current tier and billing:
- Current Plan: Displays your active status
- Plan Details: View your plan’s end date and features.
- Upgrade Plan: Easily scale your capabilities by clicking the upgrade link to access more advanced features.

My bots #
The My Bots section is your central dashboard for managing your digital workforce. Whether you are just starting or scaling your operations, this is the primary location where you create and manage your bots across different channels.
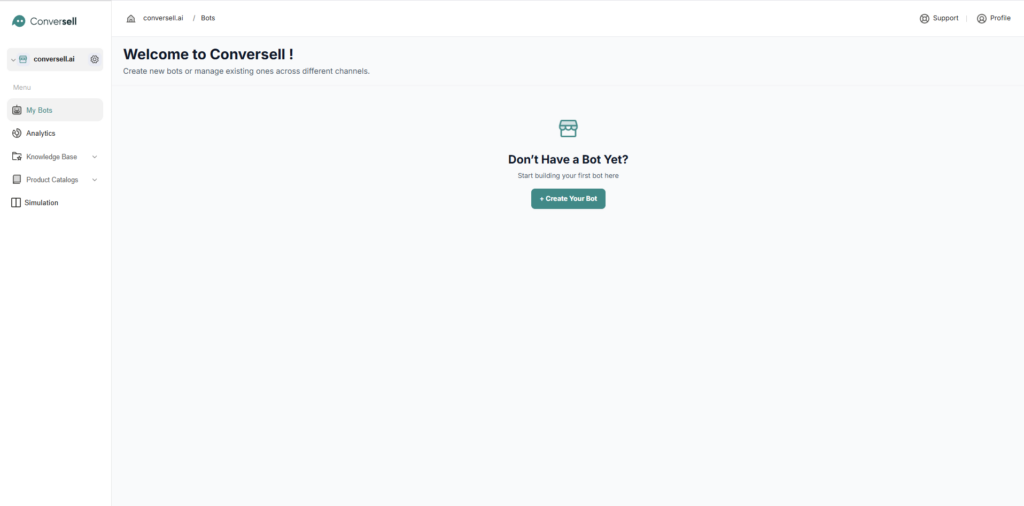
Launching Your Assistant #
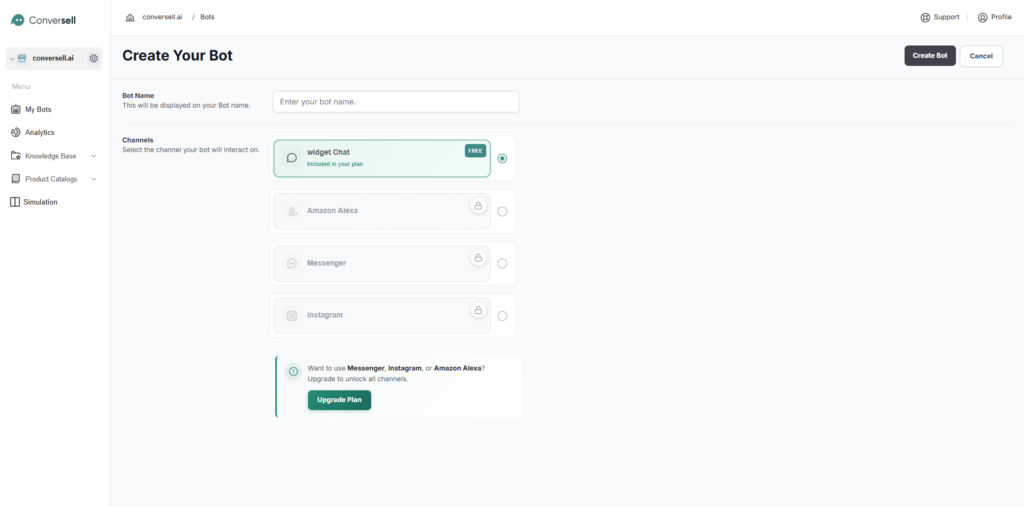
Once you click on + Create Your Bot, you will be directed to the configuration interface where you can begin defining your assistant’s reach.
- Bot Name: Start by entering a unique Bot Name, which will be the identity displayed to your users during interactions.
- Channel Selection: You can then select the platforms where your bot will interact. Depending on your current Subscription Plan, you can choose from various channels:
- Widget Chat: The standard web integration (available in the Free plan).
- Premium Channels: Options like Messenger, Instagram, and Amazon Alexa can be unlocked by upgrading your plan.
Bot Configuration #
General Settings #
The General Settings module allows you to customize your chatbot’s identity, behavior, and user interface to align with your brand’s voice and operational needs.
1-Bot Persona
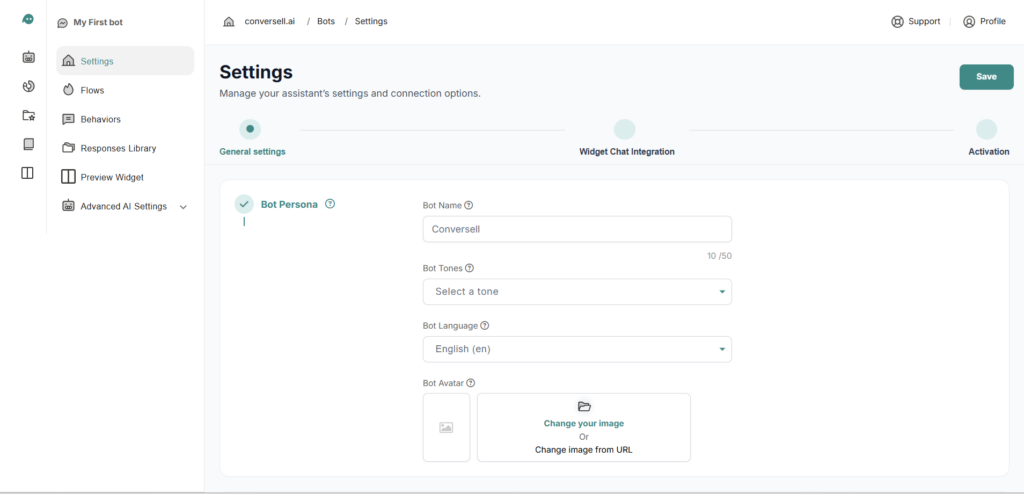
Define the « personality » of your assistant to ensure a consistent user experience:
- Bot Name: Set the display name for your chatbot .
- Bot Tones: Select the conversational style (Professional, Friendly, Concise…) to match your brand.
- Bot Language: Choose the primary operating language for the assistant.
- Bot Avatar: Upload a custom logo or image to represent the bot in the chat interface.
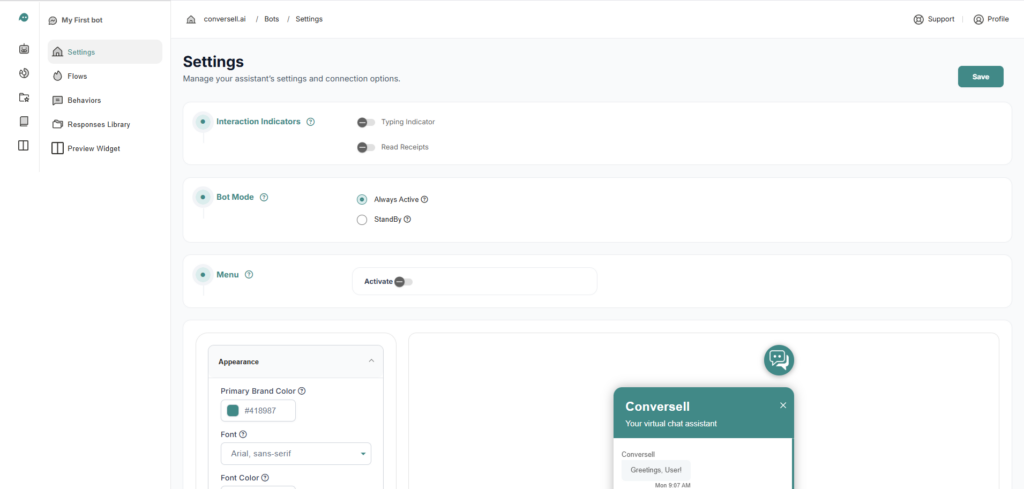
2- Interaction Indicators
Enhance the user experience by making the conversation feel real-time:
- Typing Indicator: When enabled, users see a « typing… » animation while the bot generates a response.
- Read Receipts: Displays a visual confirmation (double checkmarks) once the user has viewed a message.
3. Bot Mode
Control the availability of your assistant:
- Always Active: The bot is online and ready to respond to users 24/7.
- StandBy: Temporarily pauses the bot’s automated responses and everything becomes handled by a human agent.
4. Menu Configuration
The Menu feature provides users with quick-access buttons to frequently asked questions or specific services:
- Activation: Toggle the persistent menu on or off.
- Menu Items: Create up to 3 numbered shortcuts.
- Response Type: Assign each menu item to a Saved Response (triggering a specific bot flow) or a URL (redirecting the user to an external webpage).
5-Appearance Settings
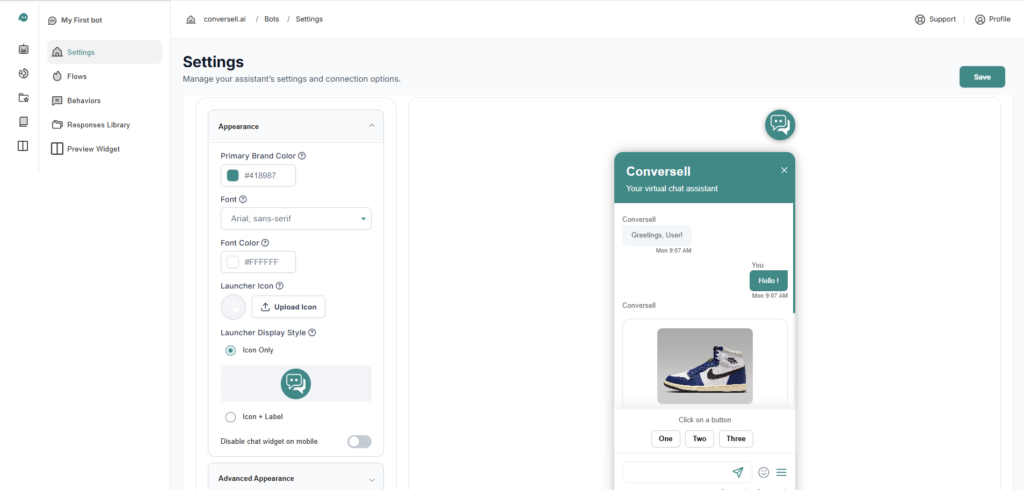
This section manages the visual interface that your users will interact with.
- Primary Brand Color: Sets the main color theme for the widget header, user message bubbles, and action buttons.
- Font: A dropdown menu to select the typography used for all text within the chat interface.
- Font Color: Determines the color of the text displayed within the widget to ensure readability against the brand color.
- Launcher Icon: Allows you to upload a custom image or logo that serves as the button users click to open the chat.
- Launcher Display Style: Offers two options for how the chat trigger appears on your site:
– Icon Only: Displays only the selected launcher image.
– Icon + Label: Displays the icon alongside a text.
- Disable chat widget on mobile: A toggle switch to hide the chat interface entirely for users browsing on mobile devices.
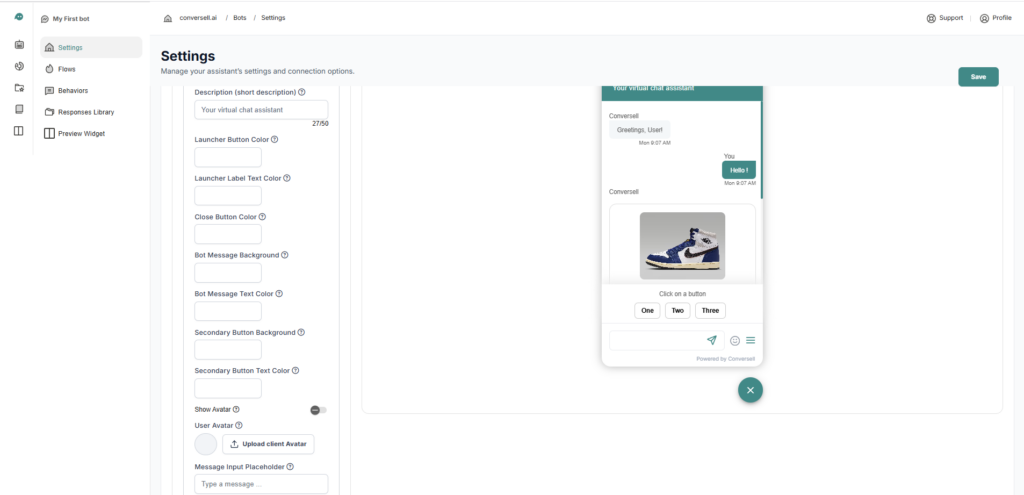
5-Advanced Appearance Settings
The « Advanced Appearance » dropdown provides deeper customization for specific UI elements.
- Description (short description): The sub-header text displayed under the Bot Name ( « Your virtual chat assistant »).
- Launcher Button Color: Customizes the background color of the floating launcher button.
- Launcher Label Text Color: Sets the color for the text if « Icon + Label » is selected.
- Close Button Color: Changes the color of the ‘X’ icon used to minimize the chat.
- Bot Message Background: Sets the background color specifically for the bubbles containing the bot’s responses.
- Bot Message Text Color: Sets the text color for the bot’s responses.
- Secondary Button Background/Text Color: Controls the styling of interactive elements like the quick replies « One », « Two », and « Three » shown in the preview.
- Show Avatar: A toggle to enable or disable the display of the bot’s profile picture next to messages.
- User Avatar: Allows you to upload a default icon representing the customer in the chat.
- Message Input Placeholder: Customizes the hint text in the typing box (« Type a message… »).
Live Preview
The right-hand panel provides a real-time mockup of your widget. It demonstrates how your chosen colors and fonts will look with various content types, including text, product images, and quick-reply buttons.
Note: Don’t worry, a reset button will always be displayed whenever changes are made, allowing you to easily revert all settings back to their original state.
Widget Chat Integration #
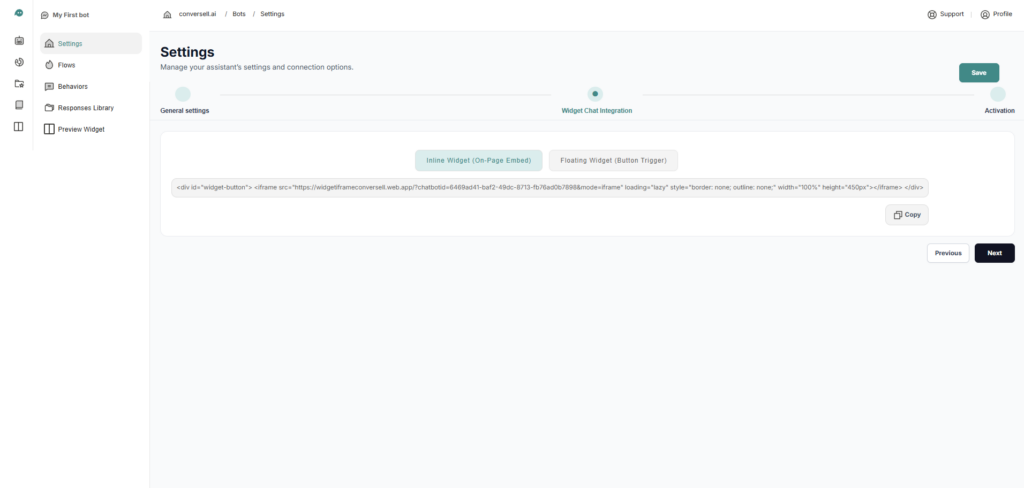
This stage allows you to choose how the chatbot is embedded and provides the corresponding code snippet.
Integration Types
- Inline Widget (On-Page Embed): This option allows you to embed the chat interface directly into a specific section of your webpage. It is ideal for dedicated support or contact pages where the chat is a permanent part of the layout.
- Floating Widget (Button Trigger): This option creates a floating button (usually in the bottom corner of the screen) that expands into the chat window when clicked.
Implementation
Copy Function: A Copy button is available to quickly grab the code for your developer or to paste into your website’s CMS.
Embed Code: A generated HTML <iframe> code block is provided. This code contains your unique chatbotid and styling parameters .
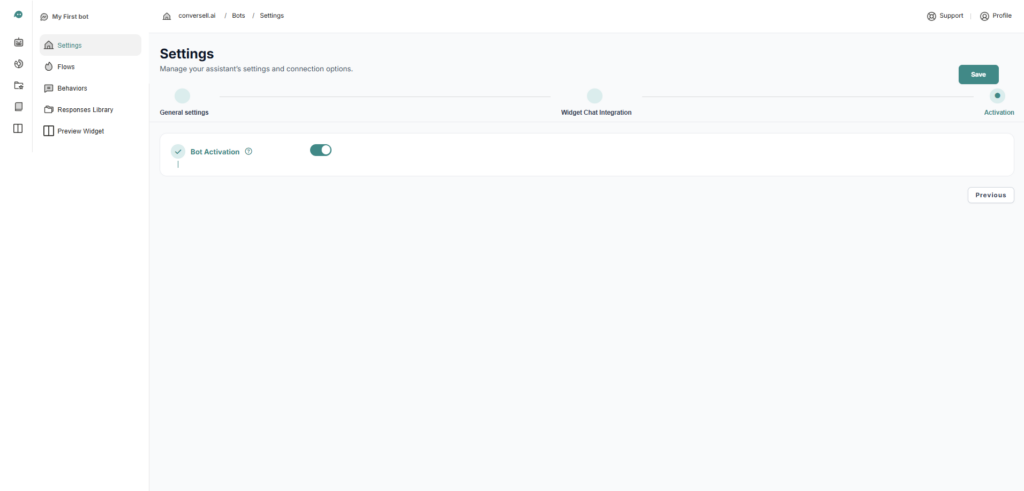
Activation #
Once you have finished configuring your settings and integration, navigate to the Activation tab. Simply flip the Bot Activation toggle to the « On » position to make your AI assistant live and ready to interact with users.
Note: Save Your Progress, It is important to remember that a Save is required after any modification. Always click the green Save button in the top right corner of the dashboard to ensure your changes are applied and stored successfully.
Flows #
What are Flows?
A Flow is a structured conversation path designed to handle a specific user goal. It follows a simple logic: Intent → Response.
- Define the Intent: This is where you tell the bot what to look for. You provide « Training Phrases » (different ways a user might say something) so the bot recognizes the user’s goal.
- Define the Response: Once the bot recognizes the intent, this is the specific action or message it delivers back to the user.
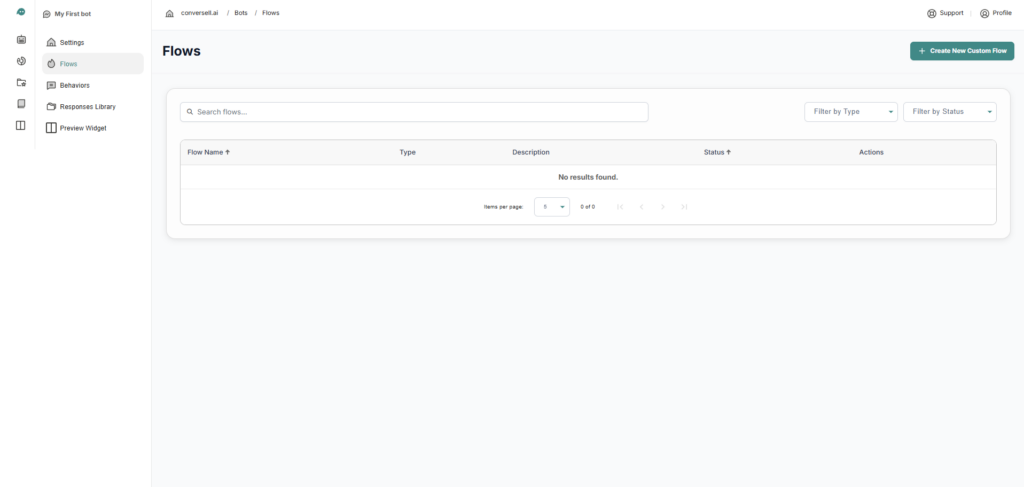
Getting Started
To begin building, click the + Create New Custom Flow button in the top right. This will open the editor where you can start mapping these intents to their perfect responses.
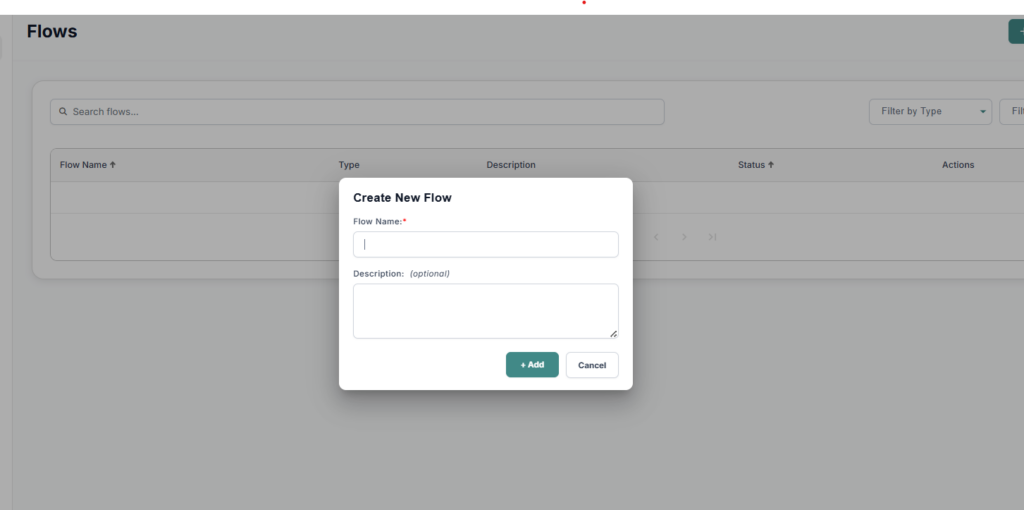
Create Flow #
To start, you must provide the basic identity for this flow. when clicking on Create New Custom Flow, a pop-up will appear where you simply put the name of the flow and can also add a small description if you’d like to keep things organized.
Once you have named your flow and clicked the Add button, you will be redirected to the main Flow Interface. This is where you finalize the two core parts of the conversation logic: the Intent and the Flow Response.
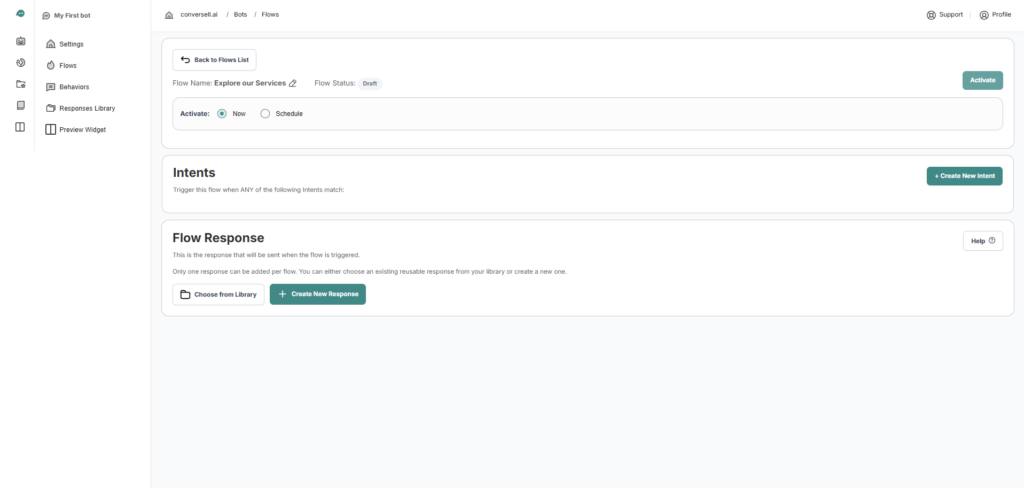
Create New Intent #
What is an Intent?
An Intent is the component that tries to understand the user’s goal or « intention ». It represents what the person is actually trying to achieve when they type a message to the bot.
The intent defines what triggers the flow. To proceed, you first need to click on + Create New Intent in the flow interface. This will open a configuration window where you teach the bot how to recognize what the user wants.
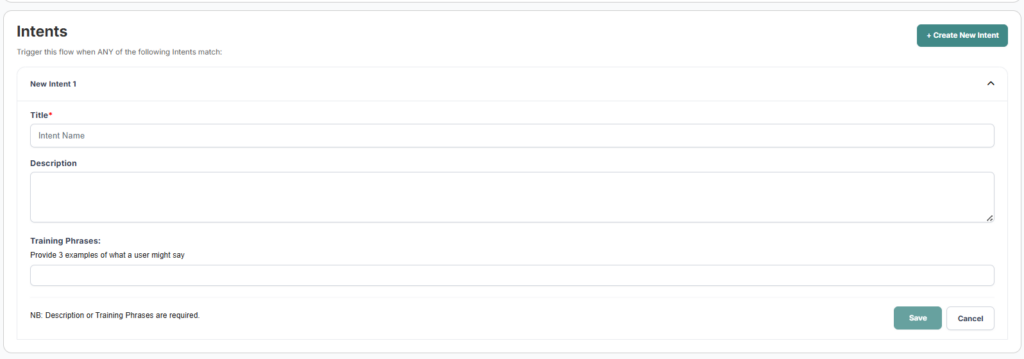
To successfully create your intent, follow these steps:
- Define the Intent Title: Give your intent a clear name (e.g « Explore our Services ») so you know exactly what user goal it covers.
- Provide a Description: Briefly describe what this intent does to help you manage your flows as they grow.
- Add Training Phrases: This is the most important part, enter various ways a user might ask for this information, such as « What do you offer? » or « Show me your products. » These phrases help the bot understand the user’s goal even if they don’t use the exact same words.
Create response #

Once your intent is locked in, the final step is to define the Flow Response, which is the actual content the bot will deliver to the user. You have two convenient options for setting this up:
- Choose from Library: If you have already built a perfect response, you can simply select it from your saved library to save time.
- Create New Response: If this flow requires something unique you can build a brand-new response from scratch by clicking on + Create New Response. The detailed creation of new responses will be handled specifically in the Responses section.
Behaviors #
Beyond custom flows, the platform includes Core Behaviors, which are predefined and designed to manage your bot’s fundamental personality. These behaviors handle essential interactions that occur in almost every conversation.
Key features of Core Behaviors include:
- Full Control: Every behavior can be activated or deactivated at any time depending on your needs.
- Customization: While they are predefined, the specific details can be changed, allowing you to modify the responses to match your brand’s voice.
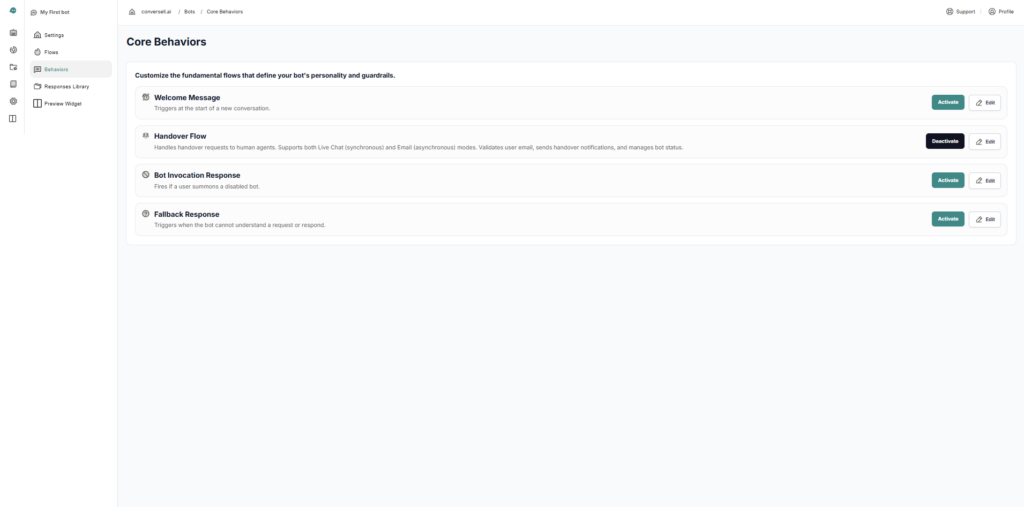
The Main Predefined Behaviors #
In the Core Behaviors dashboard, you will find four critical components:
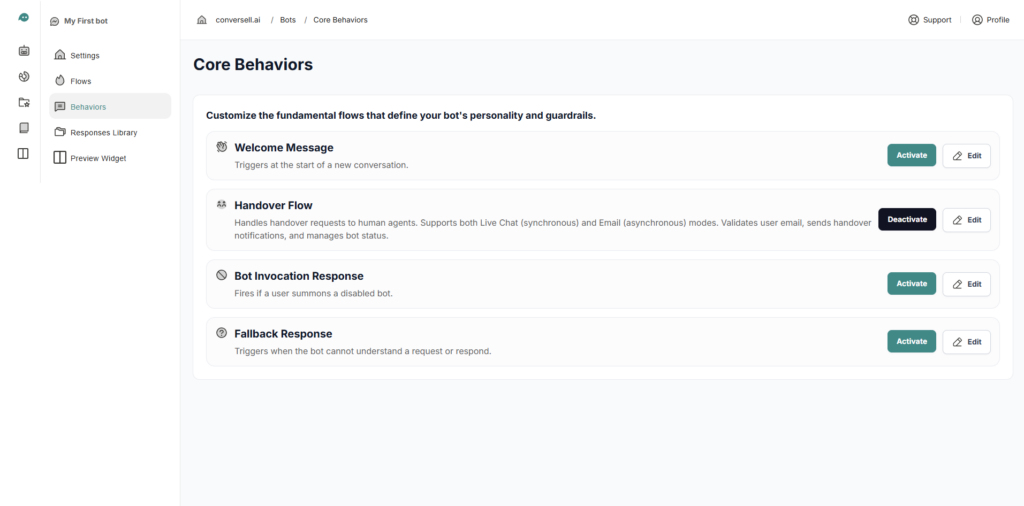
- Welcome Message:
This behavior handles the first point of contact. It triggers automatically at the start of a conversation to set the tone, whether the user is visiting for the first time or returning for a new session. It ensures the user never arrives at a silent screen. - Handover Flow:
This behavior handles the transition to human support whenever a user specifically asks to speak with an agent or needs assistance beyond the bot’s capabilities. The bot gathers the user’s contact information and a description of their issue, then sends an automated email to your team so they can follow up directly.
Required Setup: For this handover to work in your workspace, you must enable email notifications and provide a valid destination email address where user issues will be sent. - Bot Invocation Response:
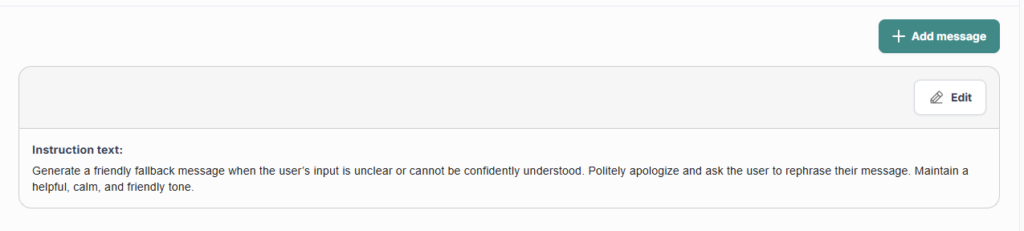
This behavior handles the scenario where a user attempts to interact with a bot that has been disabled. It ensures the user receives a professional and clear response even when the automated assistant is not currently active. - Fallback Response:
The Fallback Response triggers automatically whenever the bot cannot provide a confident answer. This occurs when there is a lack of information in the database, when the user is not understood, or when the request is off-topic.
Editing Core Behaviors #
When you click the Edit button next to any Core Behavior, you access the underlying logic that drives the bot’s actions. This section allows you to customize the specific instructions used by the bot to handle different situations.
- Instruction Control: Each scenario contains the specific instructions the bot follows to generate a response. You can edit these if you need the bot to follow a different set of rules or adopt a specific tone.
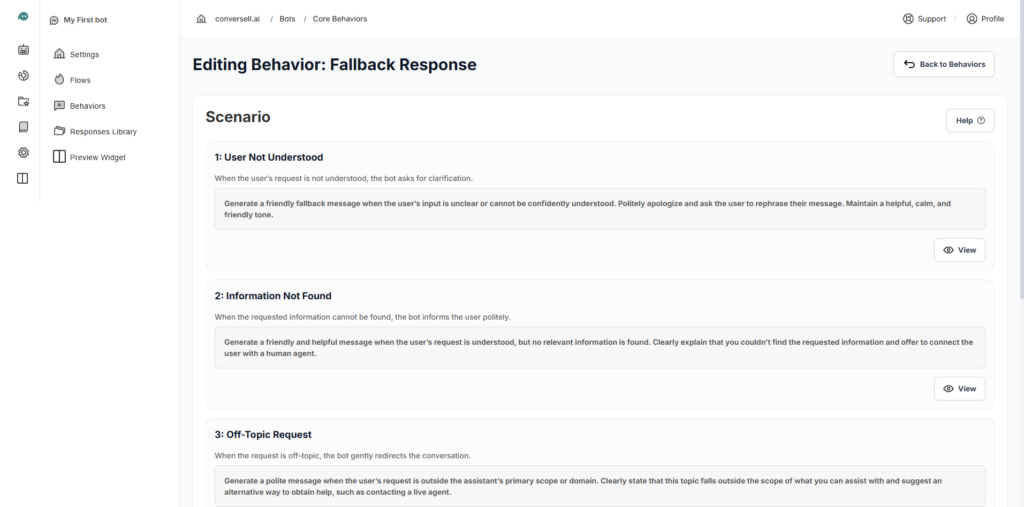
- The « View » Button: Within each behavior, clicking View on a specific action allows you to see and modify its individual logic.
- ⚠️ Proceed with Caution: While you have the power to edit these instructions, please be careful. These instructions are the foundation of the bot’s behavior; changing them too drastically can interfere with its ability to communicate effectively or handle technical tasks correctly.
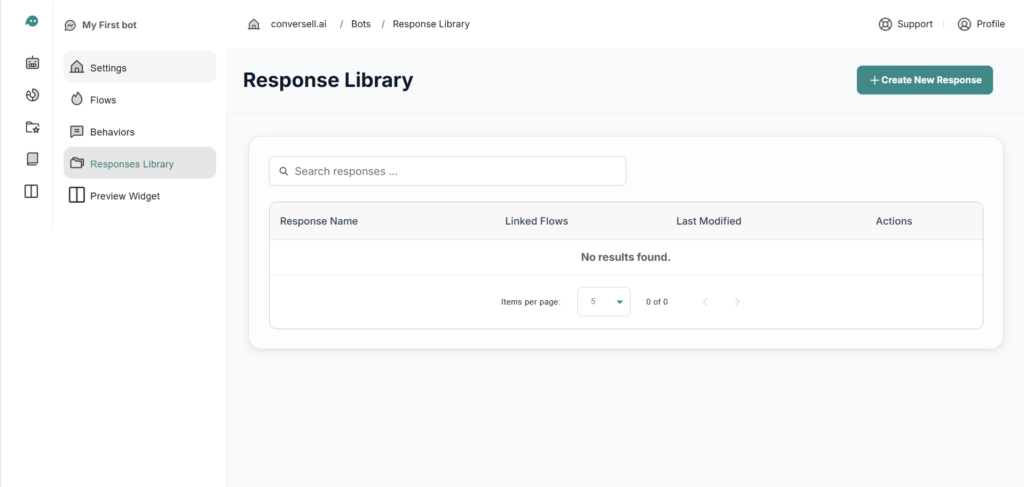
Responses Library #
The Responses Library is your specialized toolkit for building the content your bot delivers. While the bot can generate text using AI, this library is where you go when you need specific formats or structured content for your flows, menus, or button clicks.
It allows you to move beyond simple messages and define exactly how information should look and behave.
What can you define here?
In this section, you create response templates that can be triggered across different parts of the platform. You are not just writing text; you are choosing a structure for your bot’s communication:
- Custom Formats: Choose the best way to display information, whether it’s a simple text message, a visual card, or a media file.
- Integrated AI: You can define a response that uses AI-generated text while still maintaining a structured layout with buttons or links.
- Interactive Elements: Add buttons that redirect users to URLs or trigger new actions within the bot.
Create a Response #
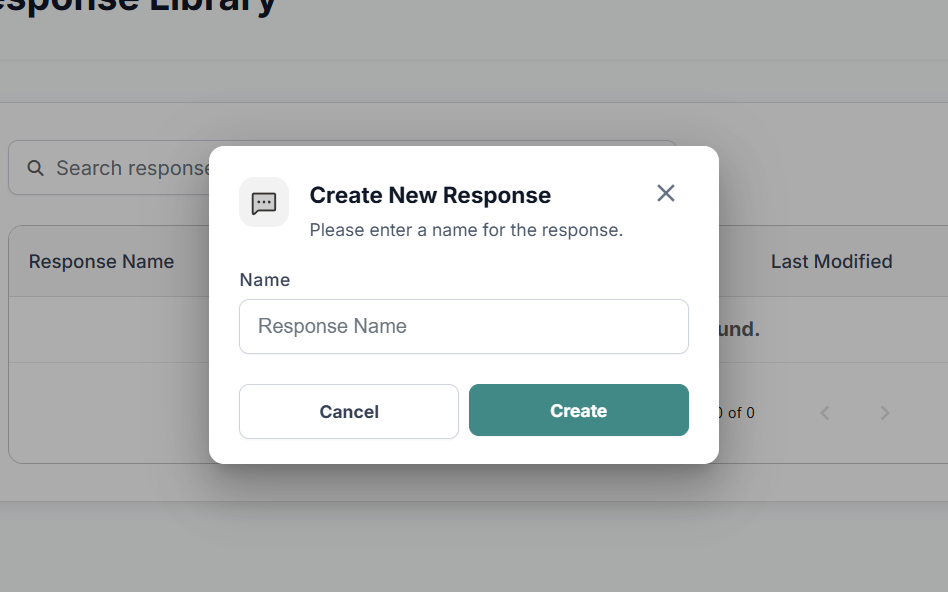
To start, click + Create New Response. You will then follow these steps to define your content:
- Response Name: Assign a unique name to identify this response
Response Types #
You can specify the format of your message by choosing one of these three types:
Preview
- Static Mode: Best for standard messages. Type the exact text the bot should display.
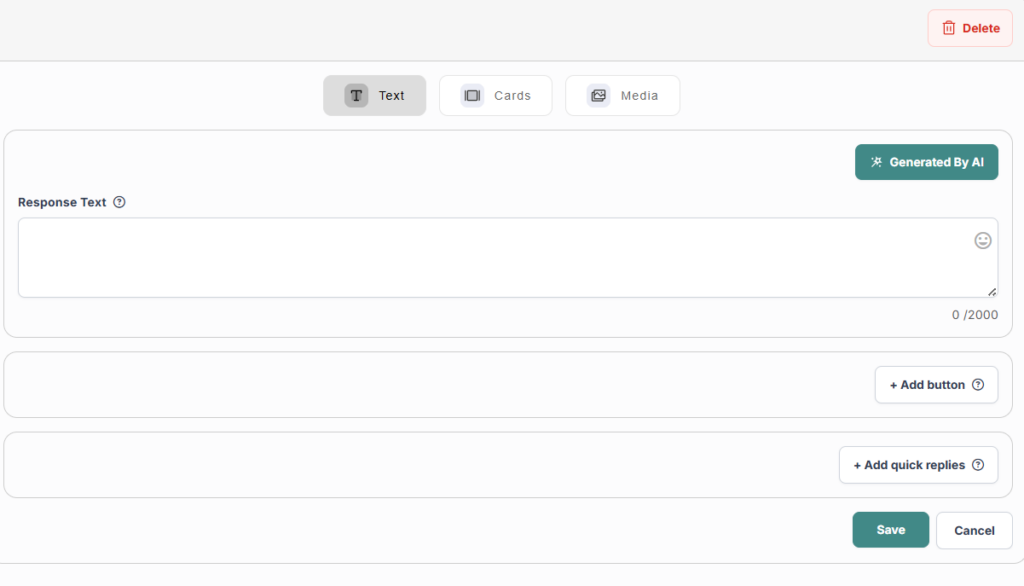
- ✨AI Mode: Enter the instruction for what the bot should say
Preview
- Static Mode: Manually upload an image and type the Title and Description.
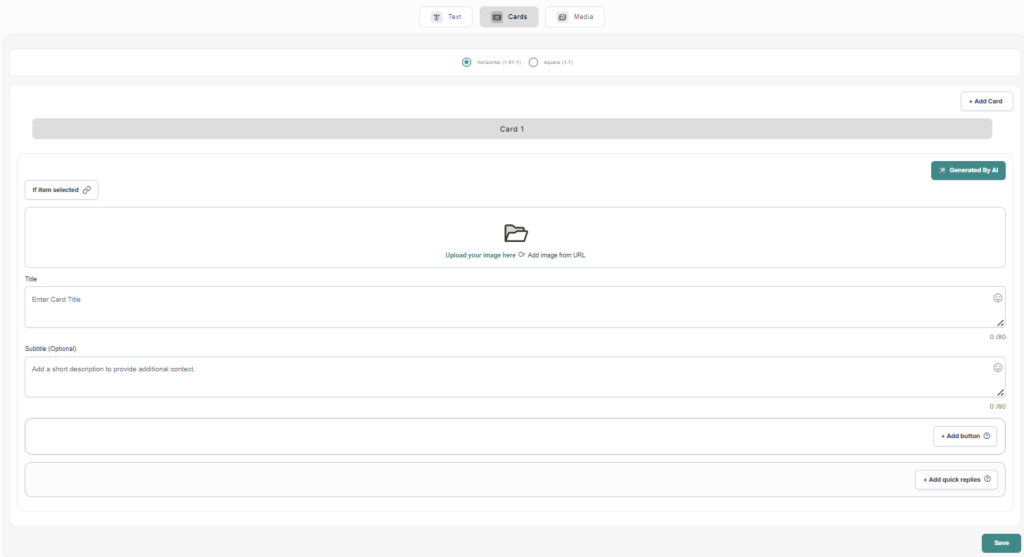
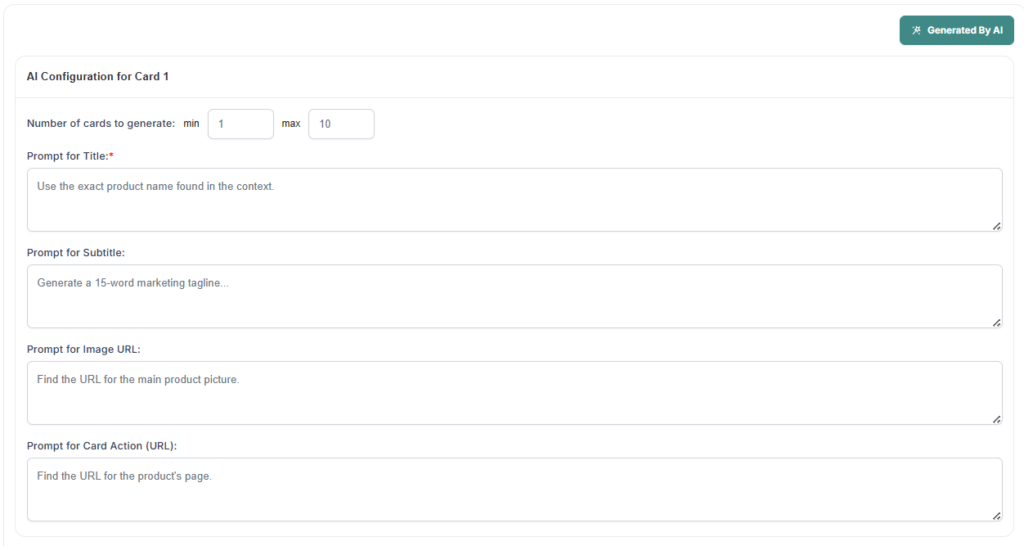
- ✨AI Mode:
- Number of Cards to Generate: Set a range (1–10) for how many cards the AI should create.
- Prompt for Title: Instruction for the card header.
- Prompt for Description: Instruction for the main body .
- Prompt for Image URL: Instead of uploading, provide a set of URLs or a description. The AI will select the most relevant path from your list to match the generated title.
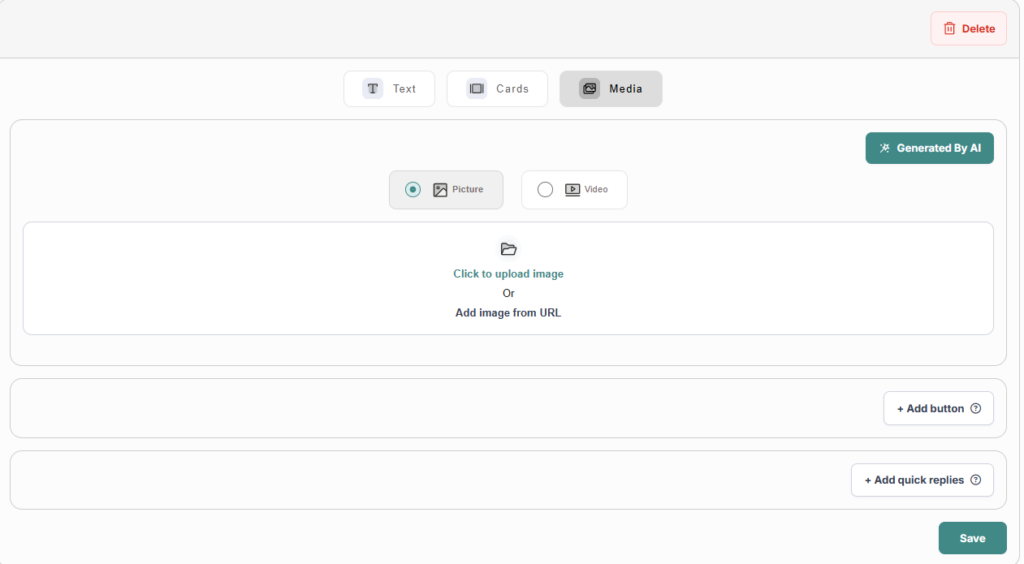
Media: Use this to send direct files like images, videos, or documents.
Enhancing Responses with Interactive & AI Tools #
When building a response in the Responses Library, you can go beyond static messages by adding interactive elements and specialized AI guidance. These tools allow you to control the conversation flow and ensure the bot provides exactly the right experience.
1. Add AI Instruction
The + Add AI Instruction button is one of the most powerful tools in the editor.
- What it does: It allows you to provide specific « behind-the-scenes » rules for that particular response.
- When to use it: Use this when you want the AI to follow a certain persona, adhere to strict safety guidelines, or use specific data points only for this message.
- The Benefit: It acts as a set of guardrails, ensuring that even if the bot is generating text, it stays perfectly aligned with your requirements for that specific interaction.
2. Interactive Buttons
Buttons are used to guide users to external resources or keep them moving through your bot’s logic.
- Button Title: The short, action-oriented text the user sees (e.g., « Book Now »).
- Actions:
- Continue the Conversation: Keeps the user within the bot to trigger the next step
- Send a Message: When the user clicks the button, the bot sends a specific text on their behalf. This is used to move the conversation to the next step.
- Start a Follow-up: This triggers another response from your library immediately after the click, allowing you to chain messages together.
- Trigger a Flow: This launches a complete Flow to handle more complex tasks.
- Continue the Conversation: Keeps the user within the bot to trigger the next step
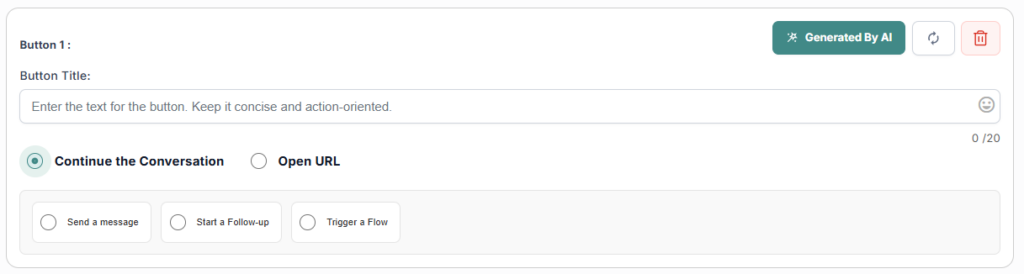
- Open URL: Redirects the user to an external website.
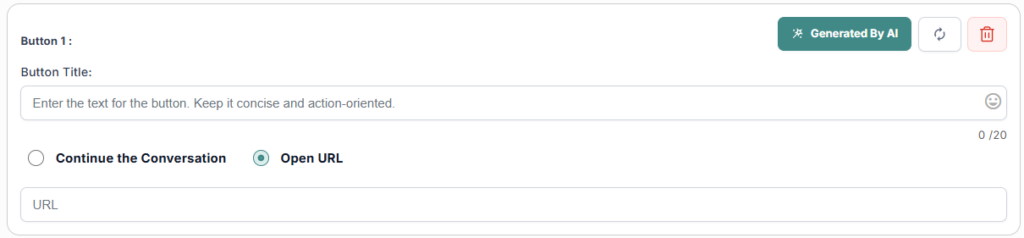
- ✨AI Power: You can even use the « Generated by AI » toggle for the button title to let the bot suggest the most engaging call-to-action.
3. Quick Replies
Quick Replies are clickable chips that appear at the bottom of a message. They are designed to make it as easy as possible for the user to provide information.
- Visuals: You can upload an icon or image to make the Quick Reply more visually appealing and recognizable.
- Custom Titles: Define what the user clicks.
- Data Collection Actions:
- Collect Email: Automatically triggers a prompt to gather the user’s email address.
- Collect Phone: Promptly asks for the user’s contact number.
- Continue the Conversation: Simply moves the user to the next logical point in the flow.
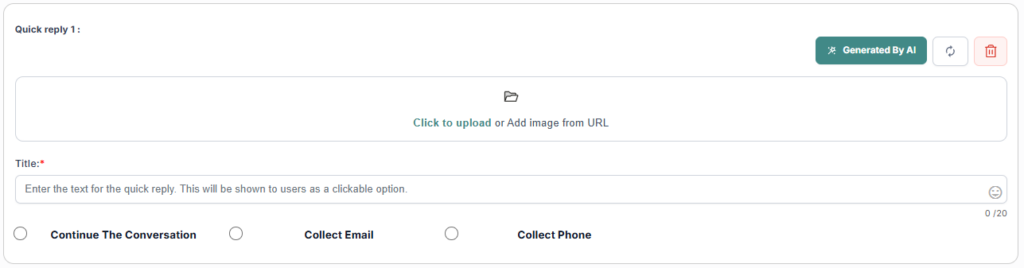
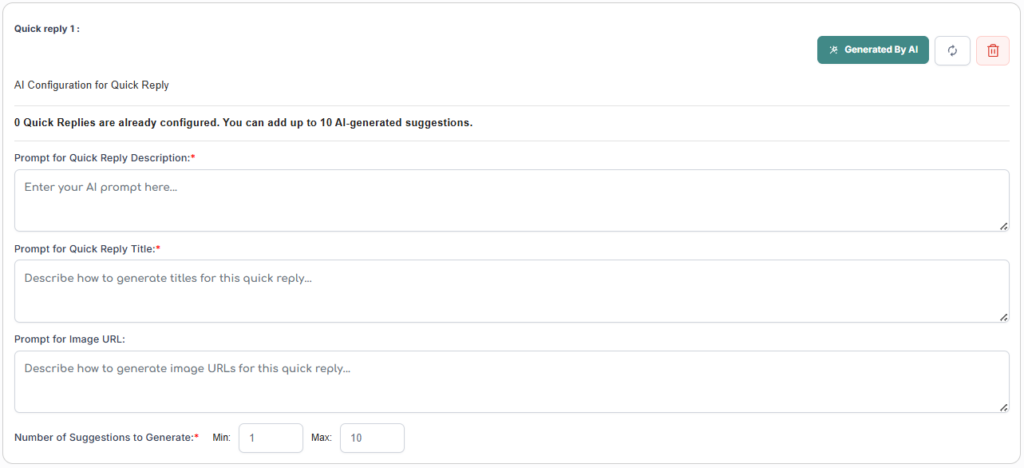
✨ The AI Power: You can even use the « Generated by AI » toggle for the quick reply to let the bot take the lead.
AI Configuration Fields:
- Prompt for Quick Reply Description: Describe the general goal or context of the interaction.
- Prompt for Quick Reply Title: Tell the AI how to style the button labels. For example, you can ask for « short, energetic action verbs » or « polite questions ».
- Prompt for Image URL: You can provide a description of the images you want or even a set of specific URLs. The AI will then intelligently select or describe the best image path to match each generated case.
- Number of Suggestions: Simply set your desired range (from 1 to 10), and the AI will generate a diverse list of options so you don’t have to.
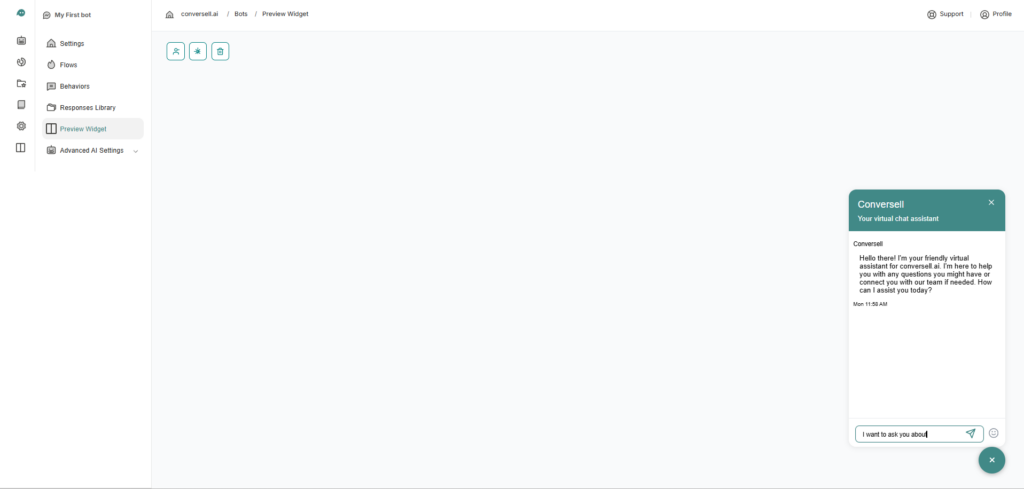
Preview #
The Preview Widget is your dedicated testing environment. It allows you to step into the user’s shoes and interact with your bot exactly as it would appear on your website. This is the final, essential step to ensure your Flows, Behaviors, and Responses are working perfectly.
Analytics #
The Analytics section provides a comprehensive overview of your bot’s performance and user interactions. It serves as a central dashboard to monitor how effectively your bot is engaging with users across different periods.
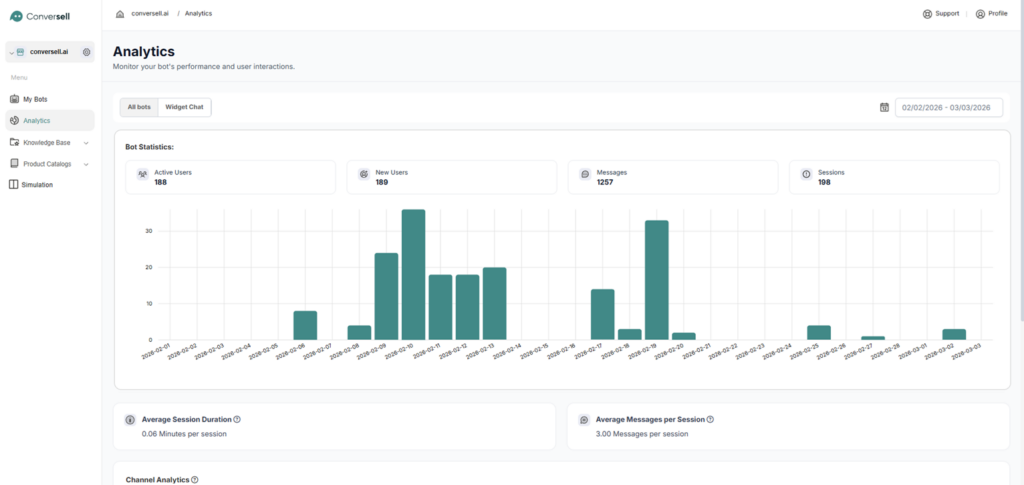
- Bot Statistics:
This section tracks the core metrics of your bot’s reach and growth.- Active Users: The total number of unique individuals who interacted with your bot.
- New Users: The number of users messaging the bot for the first time.
- Messages: The total volume of messages exchanged between the bot and your users.
- Sessions: The total number of distinct interaction periods recorded.
Filters: To get the most accurate data for your specific needs, you can customize the view using the following filters:
- Channel Selection: You can choose to view analytics for All bots combined, or isolate data for specific channels.
- Custom Periods: Use the date picker to change the Period of Analytics.
Engagement: At the bottom of the dashboard, you will find metrics that describe the quality and depth of your user interactions:

- Average Session Duration: This tracks the average amount of time (in minutes) a user spends interacting with the bot in a single session.
- Average Messages per Session: This shows the average number of messages exchanged during a session. Higher values indicate deeper engagement and more back-and-forth between the AI and the user.
In this section, you can also view Channel Analytics to see a breakdown of engagement by platform. Additionally, you can monitor Notification Analytics to track statistics related to your order tracking.
Knowledge Base: #
The Knowledge Base is your bot’s brain. It is the central place where all of its knowledge stays. By housing your information here, you create a « source of truth » that the AI uses to understand and answer user questions accurately.
Scrape Website: #
The Scrape Website tool is the fastest way to feed information to your bot. Instead of manual entry, it automatically « reads » your existing online content and pulls that data directly into the bot’s Knowledge Base.
A dedicated Data Sources section is provided on the side to track the number of links, Q&As, files, and text blocks currently in the bot’s memory, as well as the total detected characters compared to your storage limit, which depends on your specific package.
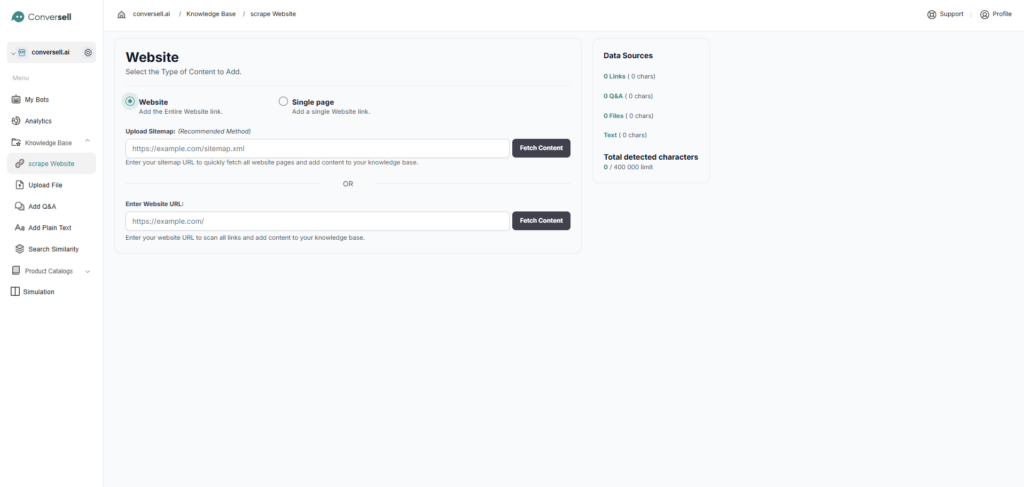
Choosing Your Scope #
You can decide exactly how much of your site the bot should learn by selecting one of two modes:
- Single Page: The bot will only pull data from one specific URL that you provide. This is ideal for specific policy pages or a single article.
- Entire Website: The bot will scan and learn from multiple pages across your domain. You have two professional options to ensure the bot finds all your content:
- Upload Sitemap (Recommended): Provide your website’s
.xmlsitemap link. This is the most efficient method because it gives the bot a clear map of every page on your site to fetch content quickly. - Enter Website URL: Simply provide your main homepage URL. The bot will then scan all available links on that page to find and add content to its memory.
- Upload Sitemap (Recommended): Provide your website’s
Note: Once a page is scraped, you have full control over that data source you can easily delete a scraped page if it is no longer needed or reload it to re-scrape the content and ensure your bot has the most up-to-date information.
Upload File: #
The Upload File tool is used to train your chatbot by directly importing your existing documents. This is the best method for providing the bot with detailed manuals, complex company policies, or structured data that isn’t available on a public website.
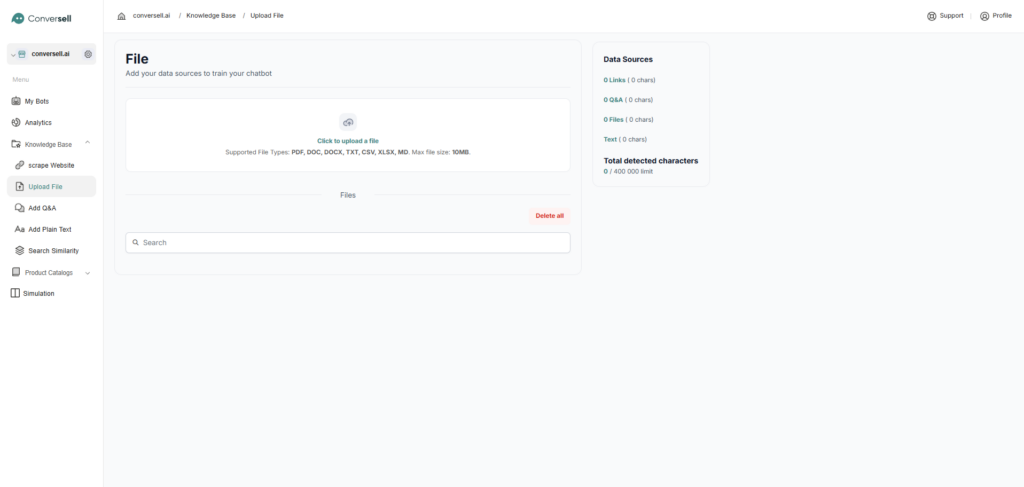
Supported Formats: You can upload a wide variety of file types, including PDF, DOC, DOCX, TXT, CSV, XLSX, and MD.
Once uploaded, your files will appear in a list where you can easily search through them or use the Delete all button to clear your file-based data sources.
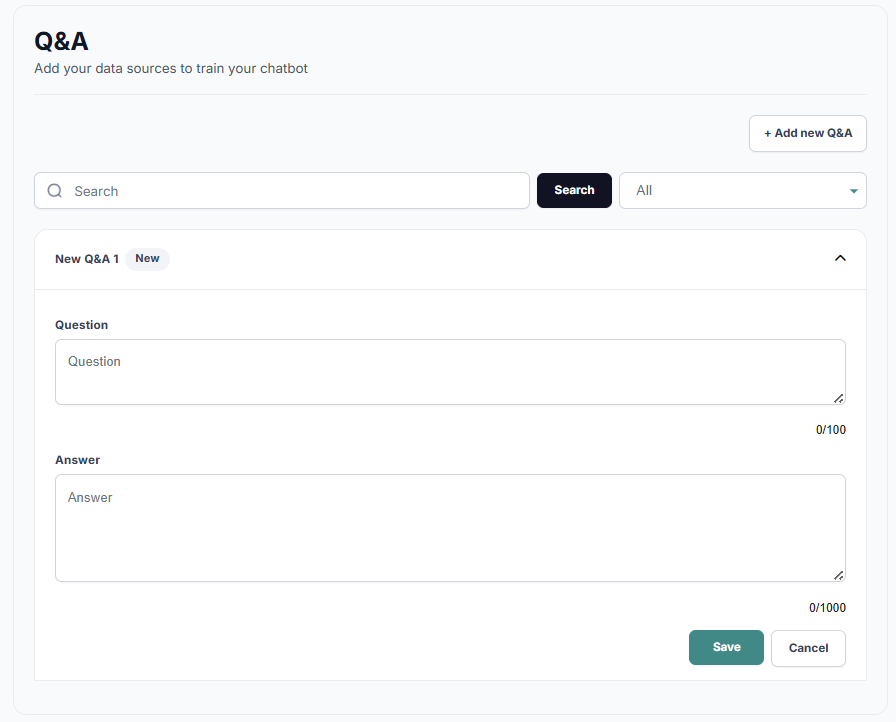
Add Q&A: #
The Add Q&A section allows you to train your chatbot by manually entering specific question-and-answer pairs. This is the most effective way to ensure the bot provides exact, approved responses to your most frequently asked customer queries.
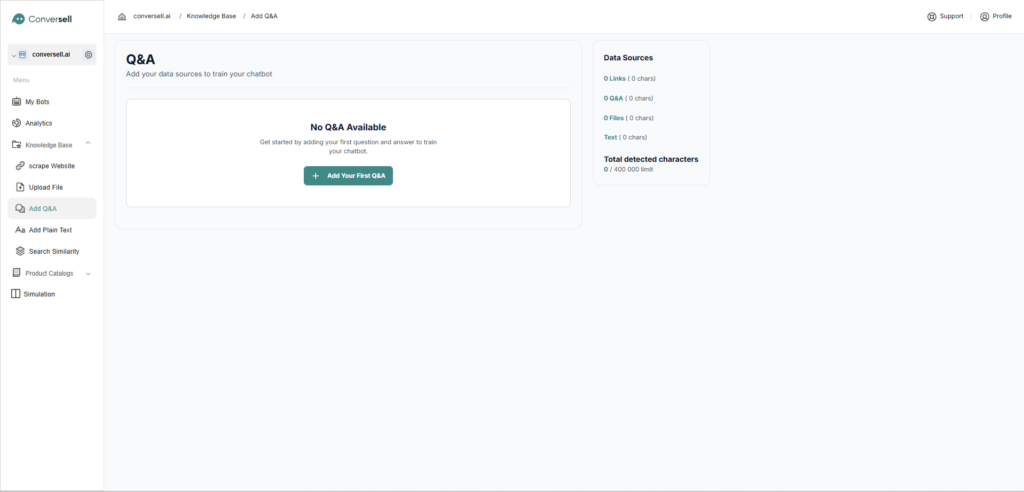
By clicking Add Your First Q&A, a section will appear where you can enter a specific question along with your desired answer. This allows you to manually define exactly how the bot should respond to certain queries, ensuring the information stays accurate and on-brand.
Add Plain Text: #
The Add Plain Text section is the simplest way to give your bot specific information without creating a file or a webpage. It is ideal for pasting short announcements and temporary updates.
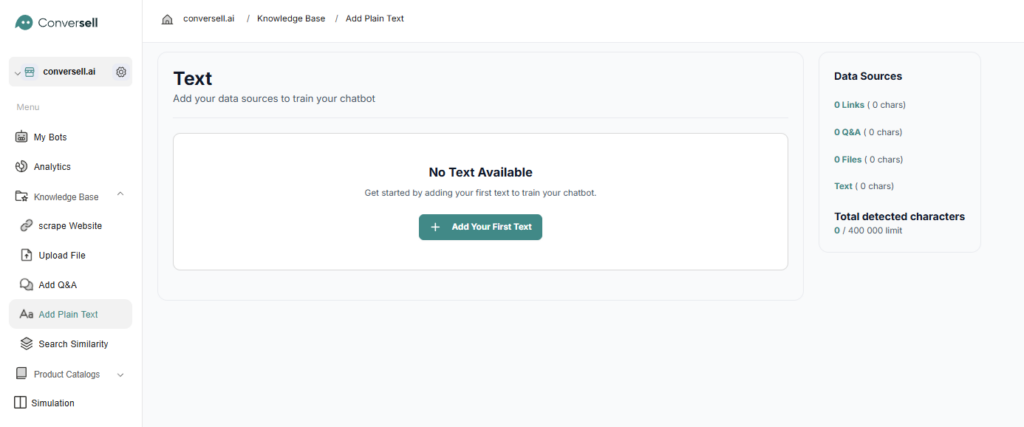
Once you click the Add Plain Text button, a dedicated text area will appear. Here, you can simply type or paste the information you want the bot to learn, allowing it to immediately incorporate those details into its knowledge base.


